A Renewed Look: Replacing a Damaged Garage Door Panel
Installation and Finishing Touches: Restoring Your Garage Door
Garage doors are not just functional components; they also contribute significantly to your home’s curb appeal. When a panel becomes damaged, whether due to an accident or natural wear and tear, it can impact both the aesthetics and structural integrity of your garage door. In this guide, we’ll explore the step-by-step process of replacing a damaged garage door panel, bringing back the visual appeal and functionality of your garage entrance. This garage door opener repair and replace service could be the best choice for you!
Before diving into the replacement process, start by assessing the extent of the damage. Carefully examine the affected panel, taking note of any dents, cracks, or warping. Once you’ve identified the specific panel that needs replacement, measure its dimensions accurately. This information is crucial when ordering a new panel to ensure a seamless fit.
When ordering a replacement panel, it’s essential to match the style and material of the existing door. Garage doors come in various designs and materials, including steel, wood, and aluminum. Opting for a panel that closely resembles the rest of your door maintains a cohesive look.
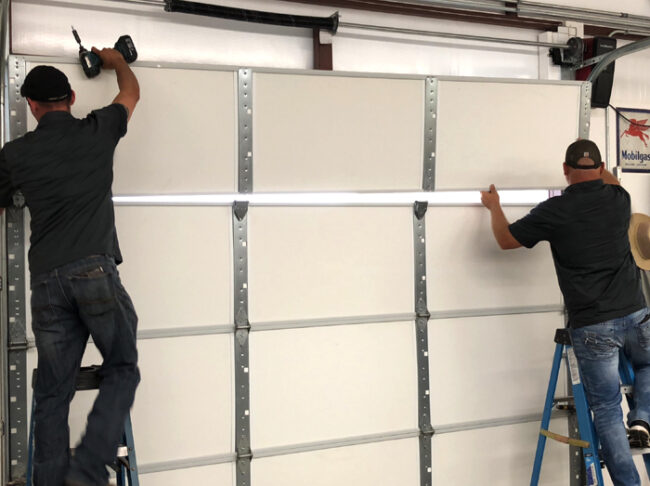
With the new panel in hand, gather the necessary tools for the replacement process. You’ll typically need a drill, screwdriver, wrench, and a helper for support during installation. Begin by disconnecting the garage door opener and manually raising the door to a comfortable working height.
Carefully remove the damaged panel by unfastening the screws and bolts securing it to the adjacent panels and frame. Take note of the order in which the panels are arranged, as this will be crucial when installing the new panel. Once the damaged panel is removed, clean the surrounding area and prepare it for the installation of the replacement.
Position the new panel in place, aligning it with the adjacent panels and ensuring a snug fit. Secure the panel by fastening the screws and bolts, replicating the original arrangement. With the new panel in position, reconnect the garage door opener and test the door’s operation to ensure smooth functionality.
To achieve a uniform appearance, consider painting or finishing the new panel to match the existing color and texture of your garage door. This final step enhances the overall aesthetics and ensures a cohesive look for your renewed garage entrance.
By following this step-by-step guide, you can confidently replace a damaged garage door panel, restoring both the visual appeal and functionality of your garage door. Regular maintenance and prompt panel replacement contribute to the longevity of your garage door, ensuring it remains a reliable and attractive feature of your home.